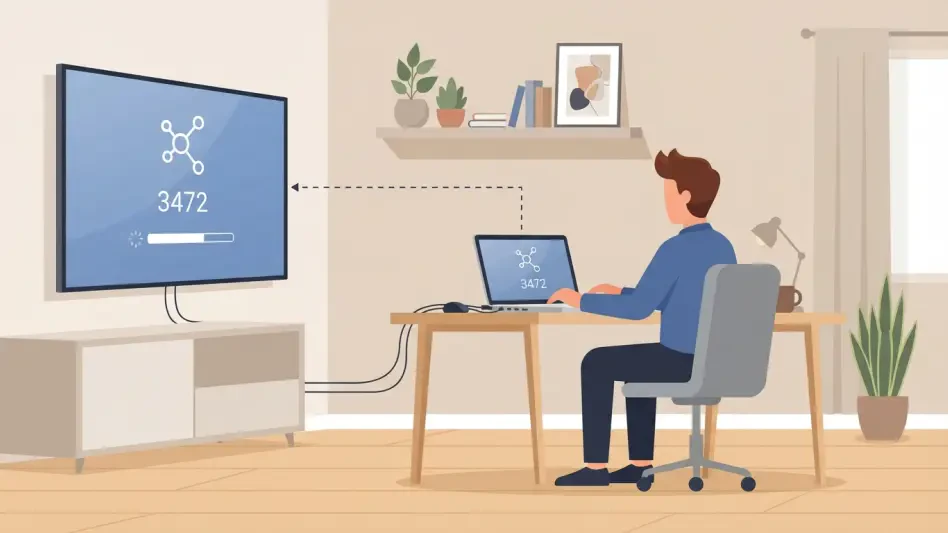
Fake meeting invitations serve as a common lure, convincing targets that a device code is actually a meeting ID required to join a secure conference. This deceptive tactic exploits a legitimate feature of the Microsoft identity platform known as the OAuth 2.0 device authorization grant. In its intended form, this process allows users to sign in to devices that lack an easy way to input text, such as smart televisions, printers, or IoT hardware. By displaying a short code on the screen and directing the user to a verification URL on a separate mobile device or computer, Microsoft ensures a seamless login experience for various hardware configurations. However, cybercriminals have adapted this convenience into a sophisticated phishing method that bypasses traditional security warnings. Unlike standard phishing, which often relies on fraudulent websites that mimic a login page, device code phishing utilizes the actual, legitimate Microsoft sign-in portal. Because the victim is typing the code into a genuine “microsoft.com” domain, the usual advice to check the URL for authenticity fails to alert the user to the danger.
The threat landscape in 2026 has seen a significant increase in these attacks because they effectively circumvent multi-factor authentication (MFA) without the need for complex technical exploits. When a victim enters the provided code and completes the sign-in process, they are effectively authorizing the attacker’s session. The attacker, who initiated the code request on their own machine, receives the access and refresh tokens directly once the victim finishes the authentication on their end. This means the attacker never needs to know the user’s password; the victim provides the necessary approval and the secondary authentication factor on the attacker’s behalf. This shift in methodology represents a move away from credential harvesting toward session hijacking, where the goal is to obtain persistent access to an active account. Organizations are finding that traditional defensive measures must be augmented with specific policies that restrict the use of these authorization flows to authorized devices only.
1. The Mechanics: Understanding Device Authorization Misuse
The underlying technology of the device authorization grant is designed for convenience, but its simplicity is exactly what makes it a prime target for modern social engineering. In a typical scenario, an attacker generates a device code by initiating a login attempt using a specialized script or a phishing kit. This code is valid for approximately fifteen minutes, creating a window of opportunity where the attacker must convince the target to act. The technical beauty of the attack from the perspective of the threat actor is that it requires no malware and no complex infrastructure. By leveraging the trust associated with official Microsoft domains, the attacker removes one of the most significant psychological barriers in the victim’s mind. Once the code is entered and the login is confirmed, the attacker is granted the same permissions and access levels as the legitimate user, allowing them to browse emails, access cloud storage, and interact with internal corporate resources without further interference.
This specific type of compromise is particularly insidious because it creates a persistent foothold within the targeted environment. When the victim completes the process, the attacker often receives not just an access token, which has a short lifespan, but also a refresh token. These refresh tokens can be used to generate new access tokens indefinitely until the session is manually revoked or the security policy intervenes. Furthermore, some sophisticated attackers have been observed using these sessions to register their own devices within the organization’s Entra ID environment. By doing so, they can obtain a primary refresh token, which allows them to maintain access even if the user changes their password or updates their security settings. The objective is no longer a one-time data theft but the establishment of a long-term presence for data exfiltration, lateral movement, or the deployment of ransomware. Understanding this persistence is crucial for modern defense strategies.
2. Identifying Lures: How Attackers Fabricate Legitimacy
The success of device code phishing depends almost entirely on the quality of the social engineering lure used to initiate the contact. Many of these campaigns begin with a rapport-building phase where the attacker poses as a trusted figure, such as a senior executive, a technical support representative, or a known industry professional. They often use high-pressure communication channels like Microsoft Teams, WhatsApp, or Signal to reach the target directly. Once a baseline of trust is established, the attacker sends a message containing an invitation to an important meeting or a link to a shared document that supposedly requires immediate attention. The lure is meticulously crafted to look like a standard administrative notification, often using professional branding and terminology that matches the target’s industry or specific job function. The psychological manipulation relies on the user’s desire to be helpful or their fear of missing a critical professional obligation.
Within these fraudulent communications, the device code is frequently presented as a “Meeting ID” or a “Verification Key” necessary to access the secure content. The attacker provides a direct link to the genuine Microsoft device login page, which further reinforces the illusion of safety. Because the target sees a legitimate web address, they are more likely to follow the instructions without skepticism. Some lures even mimic the automated notifications sent by collaborative tools like OneDrive or SharePoint, informing the user that a sensitive file has been shared and requires a one-time code for viewing. The time-sensitive nature of these requests is a deliberate tactic to prevent the victim from thinking too deeply about why a meeting would require an account sign-in on a device-pairing page. Recognizing that a legitimate meeting ID is never entered into a Microsoft device login portal is the single most effective way for a user to stop this attack before it begins.
3. Step 1: Update the Password You Provided on the Fraudulent Site
If you submitted a password after following a link from the phishing message, you should assume that the attacker now has it in their possession. Even though device code phishing often avoids password collection, many hybrid attacks will first lead a user to a fake login page to harvest credentials before redirecting them to the real device login portal. If you suspect that your password was compromised in any way during the interaction, the immediate priority is to change it. Navigate to the service provider’s official website by manually typing the address into your browser rather than clicking any links found in the suspicious email or message. By taking the manual route, you ensure that you are communicating directly with the legitimate server and not a proxy controlled by the threat actor. Creating a completely unique, complex password that has never been used on any other platform is the best way to prevent the attacker from using your credentials elsewhere.
After you have successfully updated your password, you must address any other accounts that shared the old credentials. Cybercriminals frequently use automated scripts to test stolen passwords against hundreds of popular services, including banking, social media, and retail sites. If the provider offers a specific security feature to “sign out of all other sessions,” you should activate it immediately. This action terminates any active connections that might have been established using the old password or a stolen session token. In the context of Microsoft environments, this step is particularly important, but it is not a complete solution on its own. While a password change is a foundational security measure, it may not automatically invalidate the specific type of tokens used in device code attacks. Therefore, this step should be viewed as the first layer of defense in a broader recovery plan, aimed at securing your identity against future credential-based intrusions.
4. Step 2: Enable Multi-Factor Authentication
Setting up multi-factor authentication (MFA) is one of the most powerful steps you can take to protect your digital identity from unauthorized access. By requiring a second form of verification—such as a code from a mobile device, a biometric scan, or a hardware security key—you ensure that a stolen password is not enough for an attacker to gain entry. You should activate this feature on your primary email account first, as it often serves as the gateway to resetting passwords for all your other services. Once the email is secured, proceed to enable MFA on banking, shopping, and professional accounts. Modern authentication methods, such as passkeys or FIDO2-compliant security keys, provide even higher levels of protection because they are technically resistant to phishing. These methods bind the authentication to the specific website you are visiting, making it impossible for a fake site to use the credentials you provide.
While you are reviewing your multi-factor authentication settings, it is essential to verify that your recovery information remains accurate and secure. Attackers who gain temporary access to an account often try to change the recovery phone number, backup email address, or set up automated email forwarding rules. These changes are designed to allow the intruder to regain access later or to monitor your communications for password reset links from other services. Check your account’s security dashboard for any unrecognized devices or applications that have been granted permission to access your data. If you find any changes that you did not authorize, remove them instantly and update your security questions. Ensuring that your MFA methods are robust and your recovery options are exclusively under your control forms a resilient barrier that makes it significantly more difficult for threat actors to maintain long-term access to your personal or professional life.
5. Step 3: Submit a Phishing Report and Clear the Message
Reporting a phishing attempt is a critical responsibility that helps protect the entire digital community from similar attacks. Instead of simply deleting the suspicious email, you should use the built-in reporting tools provided by your email client. In Outlook, you can select the “Report” option and then choose “Report phishing,” while in Gmail, the three-dot menu offers a similar “Report phishing” feature. This action sends the malicious message and its metadata to the service provider’s security team, allowing them to update their automated filters. When enough users report a specific campaign, the provider can block the sender’s address or the malicious links globally, preventing other people from falling victim to the same scam. This collective defense mechanism is vital in slowing the spread of high-volume phishing waves that target thousands of organizations simultaneously.
In addition to using automated reporting tools, you should take extra precautions if the phishing attempt occurred within a professional or educational environment. Forward the suspicious email to your organization’s internal IT or security department as an attachment before you remove it from your inbox. Sending the message as an attachment preserves the original header information, which contains technical details about the server that sent the email and the route it took to reach you. These details are invaluable for security analysts who need to track the attacker’s infrastructure and identify other potential victims within the company. Once you have reported the message internally and through your email provider, you can safely delete it. Do not engage with the sender, as replying only confirms that your email address is active and monitored, which could lead to an increase in targeted attacks in the future.
6. Step 4: Perform a System Scan if You Opened Any Attachments
If the phishing attempt involved downloading a file or clicking a link that prompted you to open an attachment, you must check your computer for potential malware. Even if the primary goal of the attack was device code phishing, many modern campaigns are multi-staged and may attempt to install “infostealer” malware or remote access trojans (RATs) as a secondary objective. In Windows 10 or 11, the most effective way to perform a deep clean is through the built-in security suite. Navigate to “Windows Security,” then “Virus & threat protection,” and select “Scan options.” From this menu, you should choose the “Microsoft Defender Antivirus (offline scan)” and initiate the process. This specific type of scan is more thorough than a standard quick scan because it runs in a trusted environment before the operating system fully loads, making it harder for advanced malware to hide or protect itself.
The offline scan will require your computer to restart, and the process typically takes about fifteen minutes to complete. It is crucial to save any open documents and close your applications before starting, as the system will reboot immediately. During the scan, Microsoft Defender will examine critical system files and areas of the hard drive where malicious code often resides. If any threats are detected, the software will automatically quarantine or remove them to prevent further damage. Once the scan is finished and the computer returns to the normal desktop environment, you should review the protection history to see what was found. Even if the scan comes back clean, performing this check provides peace of mind and ensures that no secondary infections are lingering on your hardware. Maintaining a clean system is a vital part of a comprehensive security strategy, especially after a confirmed interaction with a malicious communication.
7. Action Plan: If You Have Already Entered a Code
If you have already submitted a device code into a login box provided by a suspicious source, you must treat the situation as an active security breach. At this stage, the attacker likely has a functional session token that allows them to bypass your password and MFA. Because this type of compromise happens at the session level rather than the device level, standard actions like running an antivirus scan will not stop the intruder’s access. You must act with urgency to terminate the unauthorized session before the attacker can exfiltrate sensitive data or escalate their privileges within your network. The goal is to move faster than the threat actor can implement their secondary objectives. Following a structured response plan is the most effective way to regain control and minimize the potential impact of the compromise on your personal and professional data.
The first moments following a suspected compromise are the most critical for limiting the damage. You should assume that the attacker is currently active in your account and looking for ways to expand their reach. This might include searching your emails for confidential information, accessing cloud-integrated applications, or using your identity to send more phishing messages to your colleagues. Because device code phishing is a cloud-based attack, the remediation steps must be focused on identity management and session control. You should not waste time trying to “fix” your computer software; instead, focus all your efforts on the account itself. Whether you are a corporate employee or a private individual, the following sequence of actions is designed to systematically kick the intruder out and lock the door behind them. By following this order, you ensure that no step is missed and that the attacker is left without a way to return.
8. 1. Contact Your IT or Security Department Immediately
For anyone using a workplace or school account, the very first step must be to notify your organization’s administrators or security operations center. It is a common mistake to feel embarrassed or to try and resolve the issue privately, but delay only gives the attacker more time to move through the network. Provide your IT team with as much detail as possible, specifically noting the exact time you entered the code and which communication channel the request came through. This information allows security analysts to pinpoint the malicious session in the logs and understand the scope of the threat. In many organizations, security teams have automated playbooks ready for these exact scenarios, but they can only be triggered if the incident is reported promptly. Your transparency is a vital component of the organization’s overall cyber resilience.
Professional administrators have access to specialized tools that allow them to see the activity associated with your account from a high-level perspective. They can monitor for unusual data downloads, changes to security policies, or logins from geographic locations that do not match your typical patterns. By reporting the incident, you enable them to perform a thorough investigation that goes far beyond what an individual user can see. This might involve checking for “API” calls that the attacker used to bypass the user interface or looking for newly created inbox rules that hide the intruder’s tracks. Furthermore, the security department can use your report to warn other employees who might have received the same phishing lure, potentially stopping a wider organizational breach. In the modern threat environment, the individual user is the first line of defense, and clear communication with security professionals is the most effective way to manage a successful phishing incident.
9. 2. Request a Session Revocation
When you speak with your IT department, you should specifically ask them to “revoke refresh tokens” for your account. This is a critical technical action that goes beyond a simple password reset. In modern identity systems like Microsoft Entra ID, an active session is maintained by “tokens” rather than just a continuous login. An “access token” allows the user (or the attacker) to perform actions, while a “refresh token” is used to get new access tokens when the old ones expire. If an attacker has stolen these tokens through a device code attack, they can remain logged in even if you change your password, because the token itself remains valid. Only a manual revocation, often performed via a command like “revokeSignInSessions” in Microsoft Graph, can instantly kill all active connections and force the intruder out.
Requesting this specific action is vital because it addresses the core mechanism of the device code compromise. Without revoking the sessions, the attacker’s hardware remains “trusted” by the identity provider for as long as the refresh token is active. This persistent access is what allows cybercriminals to wait for hours or even days before carrying out their final objective, often timing their activity for when the legitimate user is offline. Administrators can also implement “Conditional Access” policies that force a fresh sign-in and require a phishing-resistant MFA method during the re-authentication process. This “reset” of your digital presence ensures that the attacker’s foothold is completely removed. Understanding the difference between a password change and a session revocation is the key to successfully remediating a modern identity-based attack, as it ensures the security response matches the technical reality of the threat.
10. 3. Review Login History and Connected Devices
After the initial emergency actions have been taken, it is essential to conduct a detailed review of your account’s login history and the list of connected devices. Attackers who successfully use device code phishing often try to register their own computer or mobile phone as a trusted device within your account environment. This is a sophisticated persistence tactic that allows them to satisfy “device compliance” checks that many organizations use to secure their data. If an attacker’s device is registered, they might be able to bypass future MFA prompts or access resources that are restricted to “company-managed” hardware. You should look for any devices in your security settings that you do not recognize, paying close attention to the device model, operating system, and the date it was first seen by the service.
The login history, often found in the “Recent Activity” or “Sign-in Logs” section of your account dashboard, provides a chronological record of every time someone accessed your account. Look for successful logins from unusual IP addresses, unknown service providers, or geographic regions where you have not traveled. In a device code attack, you might see a “risky sign-in” alert or a sign-in labeled as “DeviceCode” that originated from a location different from your own. Any unrecognized device should be removed or “disjoined” from your account immediately. This cleanup process ensures that no lingering backdoors remain. By auditing these settings, you are effectively verifying the integrity of your account and ensuring that you are the only one with authorized access. This step is a critical part of the post-incident recovery process, providing a final check against the attacker’s attempts to maintain long-term residency.
11. 4. Reset Your Credentials and Log Back In
Once your IT administrator has confirmed that all unauthorized sessions have been revoked and rogue devices have been removed, you can proceed to reset your credentials. It is vital to perform this reset from a device you know is secure, such as a computer that has just passed a full security scan or a personal phone that was not involved in the phishing incident. By changing your password after the sessions are revoked, you ensure that the new credentials are not immediately intercepted by an active intruder. When you create your new password, avoid using variations of your old one or any easily guessable information. A long, complex passphrase managed by a reputable password manager is the modern standard for personal security, as it combines high entropy with the convenience of not having to memorize dozens of unique strings.
As you log back into your account with your new credentials, you may be prompted to re-enroll your multi-factor authentication methods. This is an excellent opportunity to upgrade your security by choosing the most robust MFA option available to you. If your organization supports it, prioritize using a physical security key or a passkey over SMS-based codes or simple “approve” notifications. These advanced methods are designed to be “phishing-resistant” because they require a physical interaction or a biometric check that is tied to your specific hardware. Once you have successfully regained access, take a moment to verify that your account settings, such as your display name, signature, and forwarding rules, are still correct. Completing a clean login with upgraded security measures marks the transition from a state of compromise back to a state of secure, normal operation, allowing you to return to your work with confidence.
12. 5. Alert Your Professional and Personal Contacts
Communication is a powerful tool in mitigating the secondary effects of an account compromise. Once you have secured your account, you should reach out to the colleagues, friends, and professional contacts who may have received messages from you while the attacker was in control. Cybercriminals often use the first few minutes of an intrusion to send out “lateral” phishing emails to the victim’s most frequent contacts. Because these messages come from a real, trusted account, they are incredibly effective at tricking others. By sending a quick alert—perhaps through a different channel like a phone call or a text message—you can warn your network to be skeptical of any links or files sent from your email address during the period of the breach. This proactive step can prevent a single account compromise from turning into a widespread organizational crisis.
When alerting your contacts, be specific about the time frame of the incident and what kind of messages they should look for. You might say, “My account was briefly compromised this morning between 9:00 AM and 10:30 AM. Please ignore and delete any emails from me during that time, especially those containing meeting invites or file links.” This clarity helps your contacts identify the malicious content without causing unnecessary panic. In a professional setting, this also demonstrates accountability and a commitment to the collective security of the team. Most people understand that phishing is a common threat, and they will appreciate the warning that keeps their own data safe. By breaking the chain of trust that the attacker tried to exploit, you turn a successful compromise into a learning opportunity for your entire professional circle, reinforcing the importance of verification in all digital interactions.
13. 6. Follow Security Protocols for Personal Accounts
If the phishing incident involved a personal account where you do not have the support of an IT department, you must act as your own security administrator. Start by navigating to your account’s primary security dashboard, which for Microsoft users is found at the security page of their account portal. Your first priority is to change your password and review the “Recent Activity” log for any sign-ins that did not originate from your location. Most modern services provide a clear map or list showing where and when your account was accessed. If you see a session from a country you have never visited or a device you do not own, use the “Sign out of all devices” or “Remove” option immediately. This action is the personal equivalent of an enterprise session revocation and is the most effective way to terminate an intruder’s access to your private data.
While managing your personal account, take the time to evaluate the strength of your secondary security layers. If you were previously relying on text message (SMS) codes for two-step verification, consider switching to an authenticator app or a passkey. SMS-based MFA is increasingly vulnerable to “SIM swapping” and other intercept techniques, whereas app-based or hardware-based methods are significantly more secure. Additionally, check your “App Permissions” or “Linked Services” to ensure that no third-party applications were granted access to your data during the compromise. Attackers sometimes use “OAuth” permissions to maintain access to your contacts or files even after you change your password. Removing any unrecognized apps ensures that your personal information, including your emails, photos, and cloud documents, is fully protected. Being proactive with your personal digital hygiene is the best way to ensure that a single mistake does not lead to long-term identity theft.
14. 7. Conduct a Precautionary Hardware Scan
Although device code phishing is primarily an identity-based attack that does not require the installation of software, performing a thorough hardware scan is still a wise final step in your recovery plan. This is especially true if the initial phishing message also encouraged you to download a “meeting software update” or “document viewer.” In some cases, threat actors use a “belt and suspenders” approach, where they attempt to hijack your account session while simultaneously installing a keylogger or a credential stealer on your local machine. By running a full system scan using your primary antivirus software, you can ensure that no secondary malicious payloads were left behind. This provides a clean slate for your computer and ensures that your newly updated passwords and security settings are not being monitored by hidden malware.
In addition to a standard scan, you should verify that your operating system and all your installed applications are fully up to date. Software vulnerabilities are often used by attackers to gain a foothold on a device after an initial phishing success. By ensuring that your web browsers, office suites, and security software have the latest patches, you close the technical gaps that cybercriminals exploit. If your antivirus software identifies any suspicious files, follow the recommended actions to remove or quarantine them. Once the scan is complete and your system is confirmed as clean, you can feel confident that the remediation process is truly finished. This final check rounds out your security response, moving from the cloud-based identity layer back down to the physical hardware layer, ensuring that every possible avenue of attack has been addressed and secured.
The landscape of digital threats was characterized by a significant shift in 2026, as attackers refined their methods to bypass traditional defenses. Throughout the year, the rise of device code phishing demonstrated that even the most secure domains could be used as a platform for deception if users were not properly informed. Organizations that successfully navigated these challenges were those that moved beyond simple password policies and embraced comprehensive session management and phishing-resistant authentication. The collective response from security professionals and software providers resulted in more robust monitoring tools and a higher level of public awareness regarding the misuse of legitimate features. It was determined that the most effective defense was a combination of technical controls, such as Conditional Access, and a culture of skepticism that encouraged users to verify every unexpected request. This period served as a powerful reminder that as technology evolves to be more convenient, the strategies of those who seek to exploit it will also grow in complexity. Users who learned to recognize the specific patterns of device code lures were able to protect their data and their professional reputations. The insights gained from these incidents helped shape a more resilient digital environment, where identity security was prioritized as a core component of daily life. Moving forward, the lessons of the past year have provided a clear roadmap for staying ahead of evolving threats by focusing on the fundamentals of verification and the proactive management of digital sessions.